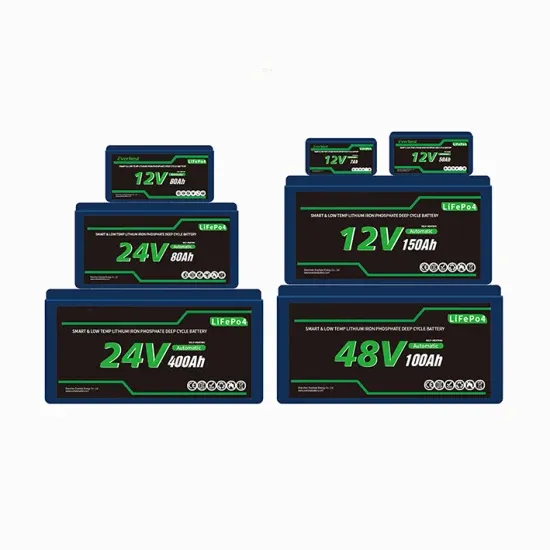
Using a generator beyond its rated capacity increases the chance of overheating. Know the wattage limits and monitor your usage. Regularly maintain your generator to identify potential issues. . Overheating is one of the most common generator issues—often caused by clogged radiators, coolant leaks, or faulty thermostats. Left unchecked, it can damage your engine and shorten your generator's life. When the outside temperature is too high, the t Prices Brand New GREAT. . Elevated temperatures refer to an increase in the ambient temperature surrounding the generator beyond its recommended operating range.
[pdf] The lights are flashing because when you disconnected the old battery, the exercise timer was erased. Press and hold the SET/EXERCISE button until the unit starts. . If the red light of your generator starts blinking, you may be wondering about the cause of the problem and how to fix it. Three blinks suggest low voltage. If the engine has failed to start, you will see four blinks. With six blinks, you have an 'engine over speed' problem. If your generator. . I had to replace the battery today and now all 5 lights (counting from right to left) flash red. Reas emble all the remaining components. The controller displays AC Sens Loss Warning. Battery Charger Fault The fault lamp illuminates yellow and the alarm horn sounds when. .
[pdf] Do You Remove the Belt on a 6. 0 Powerstroke, but the most c mmon method is by using a r ring emergencies or as a backup power source. Find step-by-step inst ctions and diagrams for. . ual adjustment point. Should belt replacement be necessary, removal of belt from unit can be ac ed holes in the pulley to the threaded holes in QD bushing. You just push the back of the generator dow into t e i suggested while you have some spar is shot. The wide fan/water pump belt is good. terminal on gen toward view r is wired to field on the voltage regulator. with the tractor running and multi meter red. . diagram will show you the correct routing of the belt, ensuring proper installation and optimal performance of your Ford Explorer. (4) Replace guard (3), screws (1), and nuts (2).
[pdf] Whether you're upgrading your system, relocating, or making adjustments, our Detach and Reset service offers a hassle-free solution. Proper removal and reinstallation are vital to ensure your solar system remains efficient and intact during renovations, upgrades, or. . In this in-depth guide, we'll detail everything you need to know about the solar panel removal and reinstallation process and the importance of using trained professionals to assist in the project. At Local Solar Services, we understand the importance of adaptability in the ever-evolving solar landscape. A Remi roofing expert to help coordinate every detail throughout your project. The simple, step‑by‑step Remi roofing process. Your solar panel removal is scheduled.
[pdf] Measure and plan the layout of the photovoltaic array. Gather tools like drills, screwdrivers, levels, and tape measures. This short and efficient video showcases the entire process, from individual components step-by-step to the completed installation. It serves as an excellent reference for anyone looking to understand. . This is the most comprehensive solar panel mounting video article, including videos of various mounting brackets. This includes iron sheet/ground roof solar panel bracket installation, tile/slate roof solar panel bracket installation. . How to install Solar Panel Mounting Brackets? Getting solar panel mounting brackets right isn't glamorous work, but it's the most important part of your solar project. Get this wrong and you could end up with a rooftop breakdown, wobbly panels or worst still a leakage.
[pdf]